International trips often require internet access the moment a flight lands. Maps, airport transfers, digital tickets, and messaging all rely on a working connection. Installing an international eSIM before departure helps a device connect to a partner network as soon as the signal appears. A step-based setup approach explains how travelers can prepare the phone for instant mobile access abroad.
Before installing any digital profile, the smartphone must support embedded SIM technology. Many travelers set up an eSIM for international travel after confirming the “Add eSIM” option within cellular settings. This option normally appears in the mobile network section of compatible devices. If the setting exists, the device likely supports digital SIM installation.
After compatibility confirmation, the next step involves selecting a plan that supports the destination country or region. Providers typically list coverage zones such as single-country packages or regional plans. Reviewing the supported countries ensures the installed profile connects to local carriers at the destination. Coverage information normally appears in the plan description.
Trip duration also affects plan choice. Short visits may require smaller internet allowances with limited validity periods. Longer trips may require larger packages with extended validity. Matching the plan to the travel duration helps maintain uninterrupted connectivity.
Once the plan is selected, the purchase process usually occurs through the provider's website or mobile application. After payment confirmation, the provider generates a QR code linked to the digital carrier profile. This code serves as the installation key for the embedded SIM configuration. The QR code often appears in an email confirmation or account dashboard.
Each QR code normally installs the profile on one device. Travelers often keep the code available on a second screen or printed page. Access to the code during setup simplifies the scanning process. This preparation avoids delays when installing the network profile.
The installation step occurs directly inside the smartphone’s cellular network settings. The user selects “Add eSIM” or “Add cellular plan” within the settings interface. The device camera then scans the QR code supplied by the provider. Once scanned, the phone downloads the network profile to the embedded SIM chip.
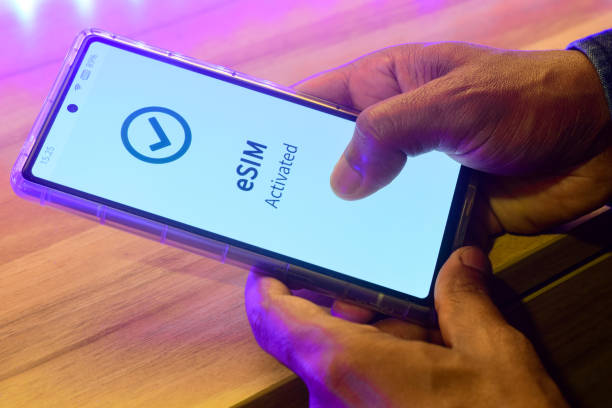
The device then requests confirmation to install the profile. After approval, the phone stores the new network configuration alongside the primary SIM profile. Travelers often assign a label such as “Travel” or “International” for easier identification.
Most smartphones follow a similar technical process during installation. Completing these steps before departure helps ensure immediate connectivity after arrival. The typical setup sequence includes the following actions.
Open the phone settings and select the cellular or mobile network menu
Choose the option labeled “Add eSIM” or “Add mobile plan.”
Scan the QR code provided after the purchase confirmation
Confirm the installation request shown on the device screen
After installation, the phone contains two possible network profiles. One profile represents the home carrier while the other represents the travel plan. The device settings allow the user to select which profile supplies internet access. Selecting the travel profile ensures the phone uses the international package.
Many phones support dual profile operation. In this setup, the home SIM may remain active. The travel profile becomes the primary internet connection. This configuration helps maintain communication with contacts while abroad.
Most international eSIM profiles operate through roaming agreements with local telecom partners. Because of this structure, roaming mode must be enabled within the travel profile settings. The option normally appears in the cellular network configuration menu. Activating this setting allows the device to connect to partner carriers.
Roaming in this context differs from traditional roaming charges. The provider already includes network access within the purchased plan. The setting simply allows the phone to register with approved partner networks. This step ensures the device gains internet access when the signal becomes available.
After landing at the destination, the device searches for available mobile signals. The installed profile then attempts registration with supported carriers listed in the plan coverage. Once the phone identifies a compatible network, a connection occurs automatically. Signal indicators appear on the device screen when registration finishes.
Many travelers depend on an eSIM for international travel because the connection activates without further configuration at the airport. Navigation tools, ride services, and communication apps become accessible immediately. The phone continues to switch between supported partner networks if signal strength changes. This automatic network selection helps maintain stable connectivity across the destination.
Preparing an international eSIM before departure helps ensure immediate internet access upon arrival. An eSIM for international travel works through a sequence that includes compatibility checks, plan purchase, QR installation, and profile configuration. Once these steps are complete, the smartphone can connect automatically to partner networks at the destination. This structured setup process helps travelers remain connected throughout international journeys.


Want to add a comment?