It is very important to match your voice in your video to the visuals. If the narration is too slow, too quick or flat, the viewers will become indifferent. This is a challenge for many content creators, particularly when the script does not fit with the video.
Some tools, such as AI Writer, allow one to generate scripts in a short period of time, yet one still has to work on the scripts to make them voice-overs that fit the video. That is where the Text-to-Speech AI of CapCut Desktop Video Editor will be needed.
It also allows you to make voiceovers that fit your video pace and tone without any difficulty. You may change the speed, style and volume to fit every scene.
Although the basic functions of CapCut Desktop Video Editor are free, there are other premium features, such as special voice effects or high-quality voices, which are paid for.
The Importance of Voice Tone and Pace Matching
The video may be misleading to the audience due to the presence of a voiceover that is irrelevant to it. As an example, a low voice on a fast-paced scene should be out of place, and a monotonic voice in a heartwrenching scene can make the video bland.
The voice is matched with the images to maintain the interest of the audience. It also makes them learn more and remain longer. The tone and the pace make your video professional and complete.
Saving a lot of time with the help of
Text to Speech AI tools can be achieved since you do not have to write everything back up. It is possible to change the voice in a short period and experiment with different voices.
You will have more time to edit and sync, and the AI will assist you to make up the intelligible, natural-sounding narration that suits your video.
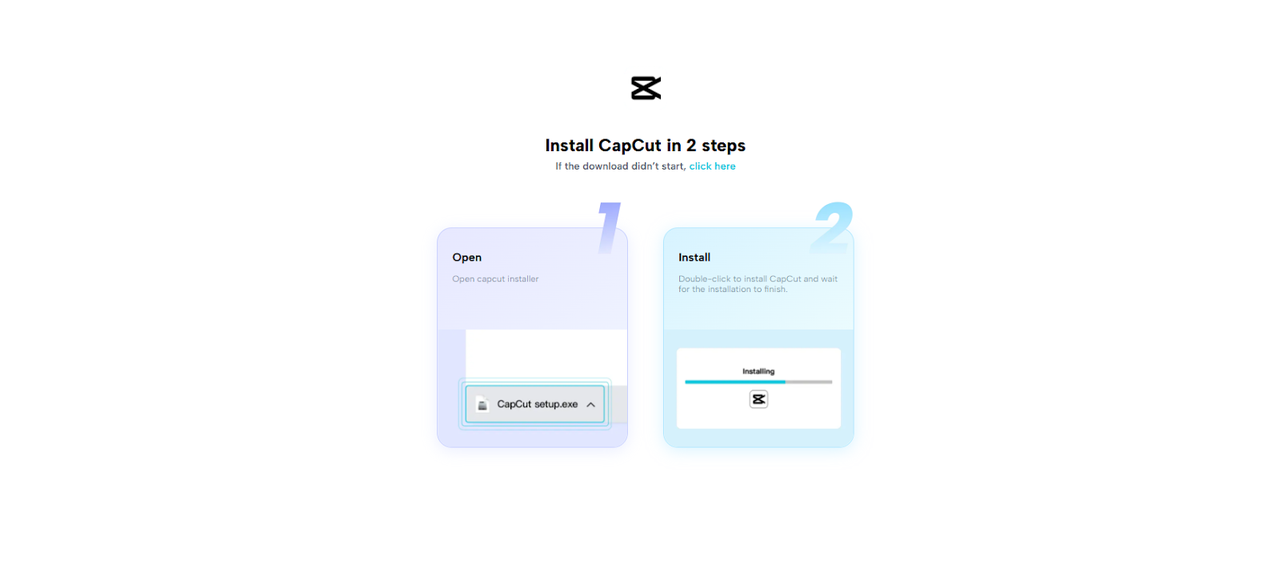
Step 1: Install CapCut Desktop Video Editor
Enjoy CapCut Desktop Video Editor by downloading it from the official site. Install the installer and go through the Windows or macOS instructions.
Ensure that your computer fits the system specs to ensure a smooth performance of AI. Although most of the features are free, a few high-end Text-to-Speech and
AI avatar tools require a subscription to be used.
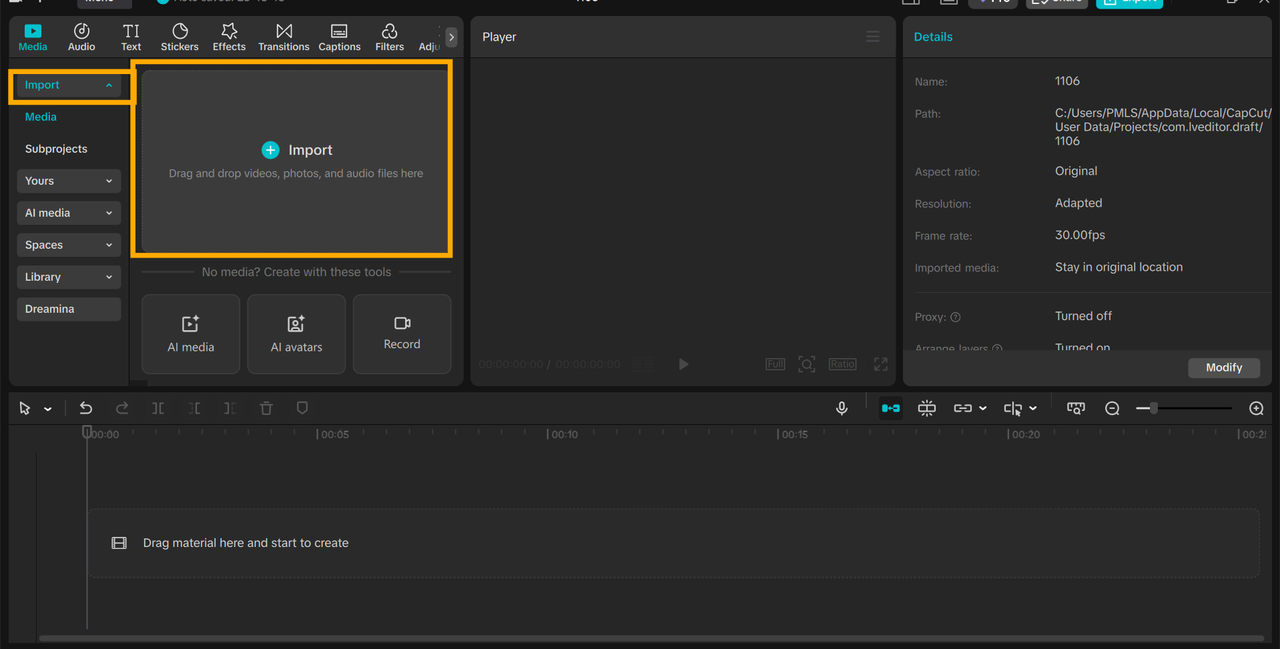
Step 2: Upload Your Video
Open the CapCut Desktop Video Editor and make a new project. Go to the Import button and choose the video on your device in order to add it to a blank canvas. It is also important to select the video to be used appropriately in accordance with the voice tone and speed.
You can also trim or cut the video into parts to match the narration. It is more convenient to organize the scenes and then add the voice to the video. This is to facilitate giving the final video a smooth and professional look.
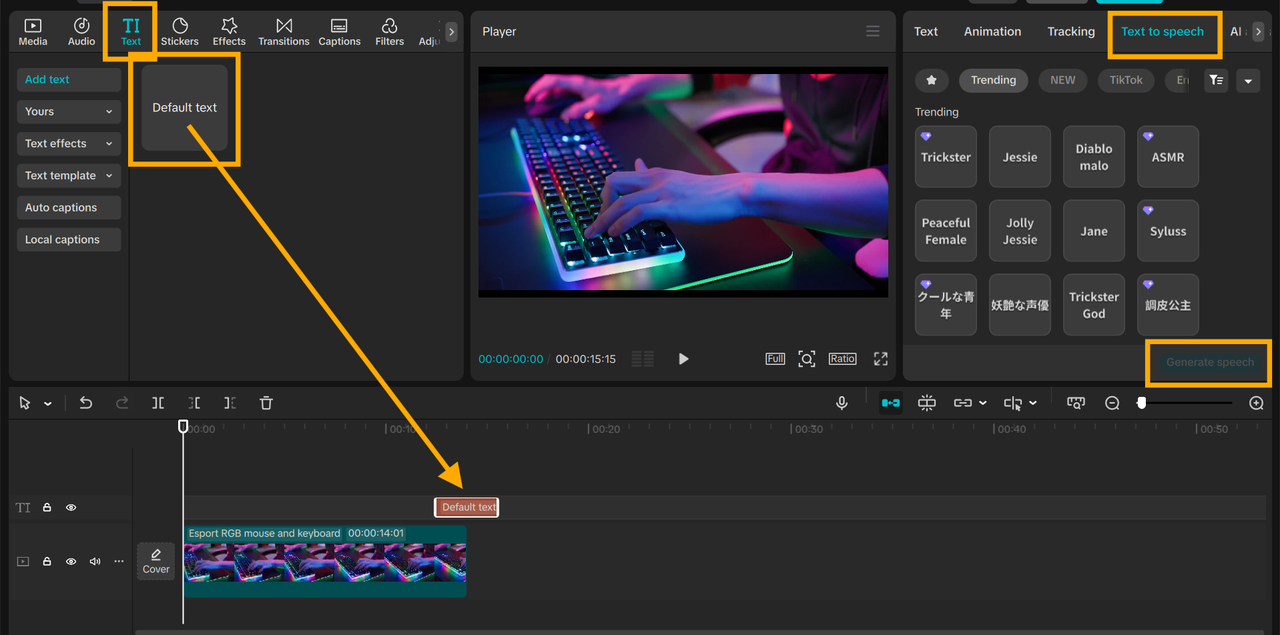
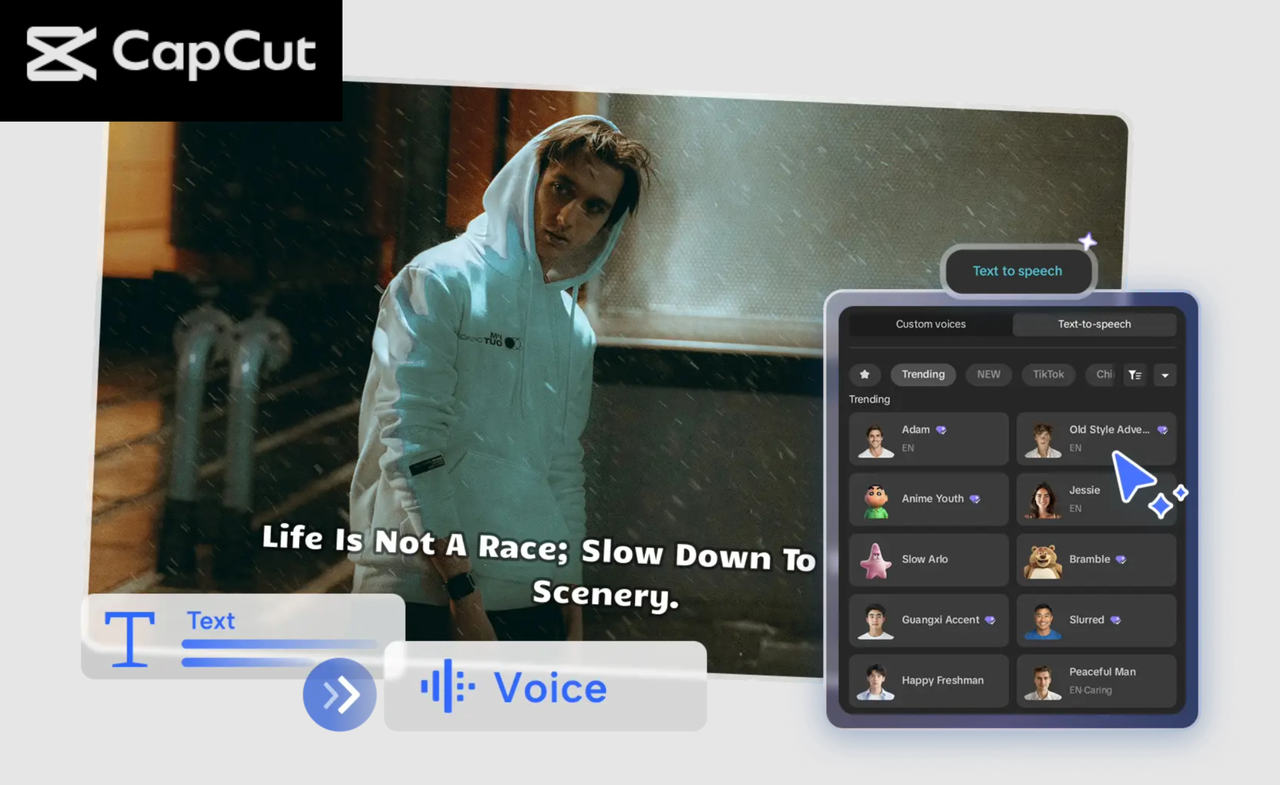
Step 3: Apply Text-to-Speech AI
First of all, you want to add text to the video, so we are going to click on Text and then Default Text. Underline the text and then press the Text-to-Speech. Choose the voice that you desire, and tune the tone and speed to suit the video. You may as well adjust the volume, fade in or fade out and decrease the background noise.
When the scenes are fast-moving, have a faster and energetic voice. To use a soft or expressive tone, choose emotional or slow moments. These minor details increase interest in the video. These sophisticated features, such as special voice styles, can be purchased.
The AI Storyboard could be of use in planning which scenes require slow or fast voices. This will make the narration coherent and appropriate for every section of your video. It is time-saving over handwriting and helps your video to appear professional and smooth.
Step 4: Preview, Adjust, and Sync
Once you have added the voice, preview your video to check the match of the voice to the scenes. Pay attention, change the tone, pace or location in each section. Ensure that the voice is flowing with transitions or changes of the images.
Minor changes can also cause significant changes in the way the video is perceived by the audience. It is quicker and simpler to use the AI Text-to-Speech functionality than to take several records.
You can fine-tune the voice until it perfectly matches the video to present your project professionally without spending hours of time on hand recording.
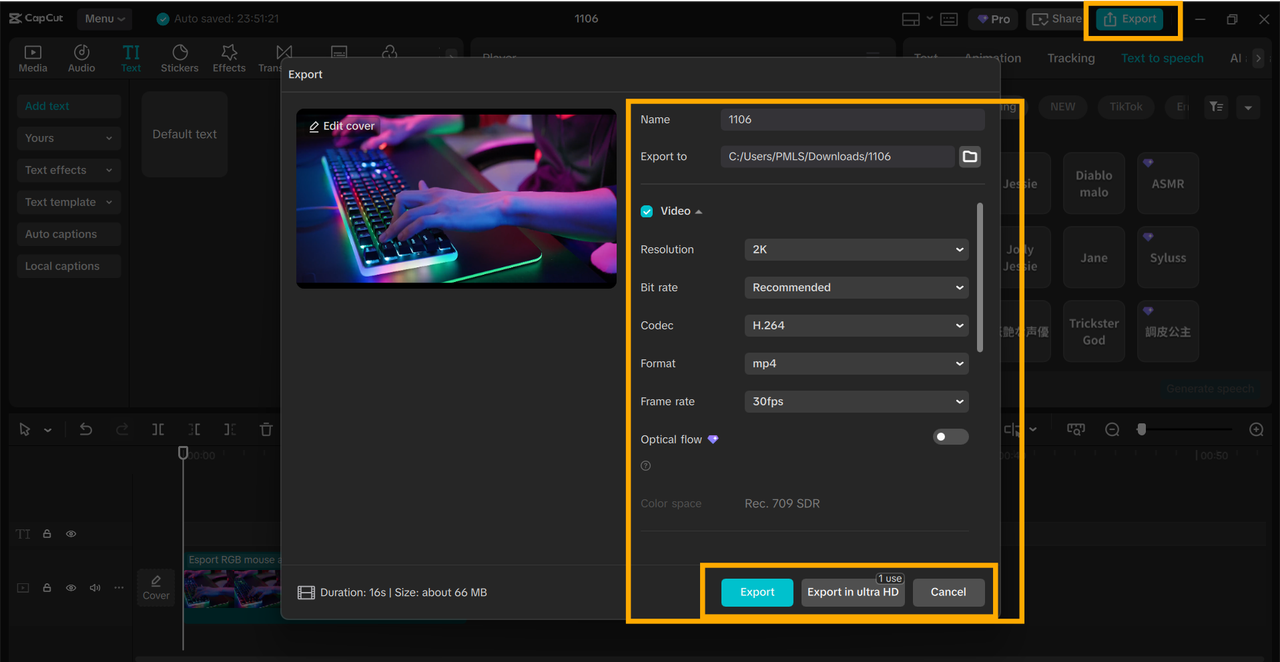
Step 5: Export & Share
Your video is ready. Now you can export it by clicking on Export. Enter the quality, format and resolution of a file name. The video can be downloaded to the device or posted on YouTube, TikTok, or Instagram.
Keep in mind that advanced capabilities might be paid for, and free exports can be restricted. CapCut Desktop Video Editor enables you to create a video that looks and sounds professional in just a few minutes and maintains a simple workflow.
Conclusion
Text-to-Speech is the AI feature of CapCut Desktop Video Editor to use to make your videos more engaging by adjusting the voice tone and speed to the visuals.
It is time-saving, enhances the viewer experience and makes your videos look professional. Get a feel of how CapCut Desktop works today, explore various voices and pacing, and find out how your videos will prove more engaging.