People spend weeks researching which laptop to buy for college. They read twenty reviews before choosing a pair of running shoes. But the equipment that determines their actual income in a video-based career? Most people wing it.
That disconnect costs real money. Someone working in video communication, live coaching, online tutoring, or any platform-based role where they appear on camera will earn dramatically different amounts depending on how they look and sound on screen. Not because of their face or body, but because of their equipment and workspace.
The difference between a $30,000 per year earner and a $90,000 per year earner in digital communication roles often comes down to a $400 equipment investment and a weekend of workspace setup. That math should get your attention.
A study published by Stanford researchers in 2024 found that perceived professionalism in video calls correlated with a 23% increase in positive outcomes during negotiations. That research focused on corporate video meetings, but the principle applies across every screen-based interaction.
When you look professional on camera, people trust you faster. They stay engaged longer. They spend more. Whether you are a therapist conducting telehealth sessions, a consultant presenting to clients, a fitness coach running classes, or a performer on a digital interaction platform, the visual quality of your stream directly affects your revenue.
This is not about being attractive. It is about looking like you take your work seriously.
Think about two restaurants serving identical food. One has clean tablecloths, proper lighting, and polished menus. The other has fluorescent overheads, paper plates, and a hand-written sign taped to the wall. You are paying more at the first restaurant without even questioning it. The same psychology governs how audiences evaluate professionals they encounter through a screen.
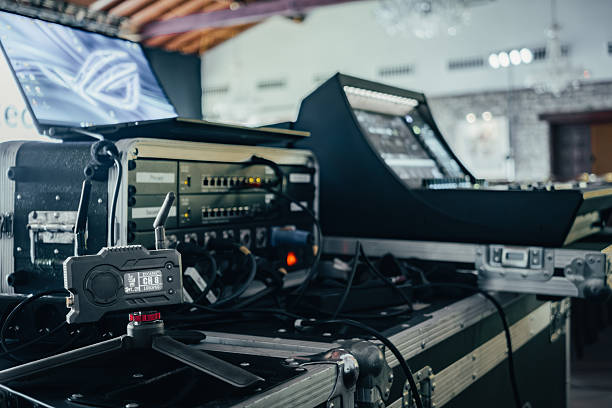
The most common mistake people make when setting up for video work is spending too much on a camera and not enough on lighting. Camera quality matters, but it matters far less than most people assume.
A $60 Logitech C920 webcam in a well-lit room produces better video than a $300 webcam in a dim bedroom. Every time. Without exception.
Here is why: digital cameras capture light. The more light available, the sharper the image, the more accurate the colors, and the smoother the motion. A premium camera sensor helps, but it cannot manufacture light that does not exist.
For anyone starting in a video-based role in 2026, the camera hierarchy looks like this:
Starter setup: Your existing laptop webcam or phone camera. Usable if lighting is excellent. Costs nothing.
Working professional setup: Logitech C920 or C922 ($50 to $80). Full 1080p, reliable autofocus, widely compatible. This webcam has been the standard recommendation for a reason. It works.
Higher-end setup: Elgato Facecam or Logitech Brio ($130 to $200). Better low-light performance, wider field of view. Worth it if you record in less controlled environments.
Overkill for most people: DSLR or mirrorless camera with a capture card ($600+). Produces beautiful footage but requires more technical knowledge and creates problems you do not need. Save this for when your income justifies it.
Most professionals in digital communication roles use the $50 to $80 tier and earn six figures. The camera is not the bottleneck. Lighting is.
A $25 ring light changed more careers than any camera ever made.
That is not hyperbole. The explosion of platform-based video work starting around 2018 coincided almost exactly with ring lights becoming cheap and widely available on Amazon. Before that, people working from home struggled with unflattering overhead lighting, window glare, and shadows that made them look like they were filming a confession video.
Proper lighting does several things at once. It smooths skin appearance by eliminating harsh shadows. It makes colors look richer and more accurate. It puts a natural catchlight in your eyes, which makes you look more alive and engaging. And it compensates for cheap camera sensors, letting even a basic webcam produce attractive footage.
Key light (the main light on your face): A ring light or a softbox positioned directly in front of you, slightly above eye level. Budget option: $25 to $40 ring light from Amazon. Better option: $60 to $90 18-inch ring light with adjustable color temperature. Professional option: an Elgato Key Light ($130) that mounts to your desk and adjusts via software.
Fill light (reduces shadows on the side of your face opposite the key light): A second, dimmer light source placed to the side. A desk lamp with a daylight bulb works. Even a white poster board reflecting your key light works. Cost: $0 to $20.
Background light (optional, separates you from the background): A small LED panel pointed at the wall behind you creates depth. Makes the image look like it was shot in a studio instead of a bedroom. Cost: $15 to $30.
Total cost for a professional three-point lighting setup: $40 to $140.
For that investment, the quality jump is enormous. I have seen people double their per-hour earnings within weeks of improving their lighting alone. The audience does not consciously think "great lighting." They think "this person looks professional" and behave accordingly.
Most cheap LED lights come in harsh cool white, around 6500K. This color temperature makes skin look pale and slightly blue. Warm lights around 2700K make everything look orange.
The sweet spot for video work sits around 4000K to 5000K. That range flatters most skin tones and looks natural on camera.
If your ring light has an adjustable color temperature dial, set it to roughly the middle position and fine-tune from there. If it does not have that feature, replace it with one that does. A warm-to-cool adjustable ring light costs about $10 more than a fixed-temperature model. That $10 upgrade is worth every cent.
People tolerate mediocre video. They will watch a grainy 720p stream if the content is good.
People do not tolerate bad audio. Echoes, background noise, tinny microphone sound, or constantly clipping volume will drive an audience away within seconds. Your audio quality sets the floor for how long someone stays engaged with you on screen.
The built-in microphone on most laptops and webcams picks up everything: keyboard clicks, room echo, the neighbor's dog, the air conditioner. It sounds hollow and distant because the microphone sits two feet from your mouth pointed at the ceiling.
Fixing this is cheap.
Starter: A clip-on lavalier microphone ($15 to $25). Plugs into your phone or computer. Sits six inches from your mouth. Immediately eliminates room echo and background noise.
Working professional: A USB condenser microphone like the Fifine K669 ($30) or Blue Snowball ($50). Sits on your desk, picks up your voice clearly, and most models have a cardioid pattern that rejects sound from behind the microphone.
Serious investment: Audio-Technica AT2020 USB ($80) or Elgato Wave 3 ($130). Better frequency response, built-in noise gates, and software controls.
One tip that costs nothing: hang a blanket or heavy curtain behind your monitor, facing you. Sound bounces off hard walls and creates echo. A fabric surface absorbs that bounce. Professional recording studios spend thousands on acoustic treatment. You can achieve 80% of the effect with a $15 moving blanket from a hardware store.
Everything visible behind you on camera communicates something to the person watching.
A messy bedroom says "I do not take this seriously." A blank white wall says "I am in a hospital or a police interrogation." A bookshelf with intentionally curated objects says "I am a real person with actual interests and taste."
You do not need a dedicated studio. You need one corner of one room that looks intentional when framed by your camera.
A plain wall with one or two decorative elements. A floating shelf with a plant and a few books. A wall hanging or framed art that adds color. String lights or an LED strip behind your monitor creating a warm backlight effect. A simple curtain backdrop in a solid color.
Visible beds, dirty laundry, piles of clutter, bare walls with visible nail holes, a window directly behind you (causes severe backlighting and makes your face a dark silhouette), posters with visible tape.
Virtual backgrounds in Zoom and similar platforms seem like an easy solution. They are not. Virtual backgrounds create a visible halo around your head and body. They glitch when you move your hands. They scream "I am hiding something behind me." A real, clean background with even basic decoration looks better than any virtual replacement.
If you absolutely must hide your actual room, use a physical backdrop. A collapsible green screen ($40) with a proper virtual background looks significantly better than the software-only version. But a real background still beats both options.
If your role involves spending several hours per day on camera, ergonomics become a serious issue. Uncomfortable seating, poor monitor height, and a cluttered desk will affect your energy, posture, and how you come across on screen.
You need a chair that supports your lower back and keeps you sitting upright without effort. Slouching on camera looks unprofessional, but trying to maintain good posture in a bad chair is exhausting.
A proper office chair with lumbar support costs $150 to $300. If that is outside budget, a $30 lumbar support cushion attached to a dining chair works surprisingly well.
Your webcam should sit at eye level or slightly above. This angle is universally flattering and creates natural eye contact with your viewer.
Most laptop cameras sit below eye level because the laptop sits on the desk surface. This creates the "up the nose" angle that makes everyone look worse. A $20 laptop stand or a stack of books fixes this instantly.
If you use an external webcam, mount it on top of your monitor. If your monitor is too low, a monitor riser ($15 to $30) brings everything to the right height.
Visible tangled cables look terrible on camera, especially if you shift your frame or stand up during a session. Velcro cable ties ($5 for a pack of 50) and a cable management tray under your desk ($15) clean this up permanently.
Keep your desk surface clear except for items you actively use. A clean desk communicates order and professionalism. A cluttered desk communicates chaos, even if the clutter is only partially visible in frame.
Here is a complete equipment list broken into tiers. Every price is approximate based on Amazon and similar retailers in early 2026.
Laptop webcam or phone camera (already own): $0
10-inch ring light with phone clip: $20
Lavalier clip-on microphone: $15
Laptop stand or book stack: $0 to $20
Clean background setup (rearrange existing furniture): $0
Cable ties: $5
Total: $40 to $60
This setup gets you started. The video quality will be decent, the audio will be clear, and you will look better than 70% of people working in similar roles.
Logitech C920 or C922 webcam: $60
18-inch ring light with adjustable color temperature: $40
Small fill light (desk lamp with daylight bulb): $15
USB condenser microphone (Fifine K669 or similar): $30
Headphones for monitoring audio: $20
Laptop stand or monitor riser: $20
Simple background decoration (shelf, plant, LED strip): $30
Cable management: $10
Total: $225
This is the sweet spot. Professional-looking footage, clean audio, a polished background. You look like someone who does this for a living because you do.
Elgato Facecam or Logitech Brio: $150
Elgato Key Light or equivalent softbox: $130
Fill light panel: $30
Audio-Technica AT2020 USB or Elgato Wave 3: $100
Boom arm for microphone: $25
Monitor arm for adjustable positioning: $40
Acoustic treatment (foam panels or moving blankets): $30
Background upgrade (collapsible backdrop or built shelving): $50
Total: $555
This setup competes with what professional content creators and streamers use. It is overkill for someone starting out but reasonable for someone earning consistently and wanting to maximize their per-session revenue.
The relationship between setup quality and income is not linear. It is exponential at the bottom and logarithmic at the top.
Going from a dark, echoey laptop setup to a properly lit space with a decent microphone creates a massive jump in perceived professionalism. That jump directly translates to longer engagement times, higher tips, better client retention, and more repeat sessions.
Going from a $225 setup to a $555 setup creates a smaller but still noticeable improvement. Going from $555 to $1,500 creates almost no visible difference to anyone watching.
The biggest gains come from the first $200 spent. After that, returns diminish rapidly. Knowing where that curve flattens saves you from wasting money on equipment that impresses other equipment enthusiasts but does nothing for your actual audience.
I have watched people spend $800 on a camera while sitting in a room with a single overhead light fixture. Their footage looked worse than someone using a phone with a $25 ring light. The lighting investment should always come first. Camera second. Audio third. Everything else is secondary.
Humans make judgments about competence and trustworthiness within the first seven seconds of an encounter. On a screen, those judgments are even faster because the viewer has less information to work with. No body language below the chest. No spatial context. No handshake.
What they have is your face, your voice, and your background. That is the entire data set they use to decide whether to stay, leave, engage, or scroll past.
Research from Princeton's psychology department showed that people assign personality traits to faces seen for as little as 100 milliseconds. Adding professional lighting and a clean background does not change your face, but it changes how your face is perceived. Well-lit faces are rated as more competent, more trustworthy, and more attractive in controlled studies compared to the same faces in poor lighting.
This is not vanity. This is applied psychology in a professional context.
Platform-based workers who understand these dynamics earn more because they control the variables that influence audience behavior. The equipment and setup choices are not technical decisions. They are business decisions that directly affect revenue.
Even people who invest in proper equipment often make errors that reduce the effectiveness of their setup.
Overhead room lights left on. Your ring light or softbox should be your primary light source. The ceiling light in most rooms creates downward shadows under your eyes, nose, and chin. Turn it off. Use only your intentional lighting setup.
Camera positioned too close. When the camera sits inches from your face, every movement looks exaggerated and the wide-angle lens distorts your features. Position the camera at arm's length minimum. Two to three feet from your face is ideal for most webcams.
Microphone positioned too far. The opposite problem. Your microphone should sit 6 to 12 inches from your mouth. Every foot of distance dramatically increases room echo and ambient noise pickup. If you are using a desk microphone, pull it close.
White walls directly behind you with no depth. A blank white wall creates a flat, institutional look. Add any visual element: a shelf, artwork, a plant, colored lighting. The goal is creating depth so you do not look like you are standing in front of a green screen.
Ignoring the frame edges. Check what your camera sees at the edges of the frame. A visible doorframe, a trash can, the corner of an unmade bed. These details register subconsciously with viewers even if they are barely visible.
Never testing the setup from the viewer's perspective. Open your camera app. Sit in your normal position. Look at the image as if you were a stranger seeing it for the first time. Is the lighting even? Is the background distracting? Can you hear clearly? Fix what you see before going live.
A professional workspace is not a one-time purchase. It is an ongoing process of small refinements.
Start with the basics: lighting, audio, camera placement, clean background. Get working. Earn income. Then reinvest a percentage of that income into incremental improvements.
Week one might be a ring light and a clip-on microphone. Month two might be upgrading to a proper webcam. Month four might be adding acoustic panels and a better chair.
Each improvement slightly increases the quality of your on-screen presence, which slightly increases your earning potential. Over a year, these small upgrades compound into a significant professional advantage.
For those building their digital workspace for the first time, you can read the full guide here covering the essential setup elements that create a professional impression from day one.
Most people entering platform-based video work focus on personality, content strategy, or marketing. Those things matter. But they matter less if the viewer's first impression is "this person looks like they're broadcasting from a closet."
Your equipment and workspace are the foundation everything else sits on. A great personality through a terrible camera is like a great singer performing through a broken speaker. The audience never gets to experience the talent because the delivery system fails them first.
The professionals who consistently earn at the top of their platforms almost always have clean, well-lit, professional-looking setups. Not because they spent more money, but because they understood that the visual quality of their stream is a direct input to their income.
That understanding is the real competitive advantage. Not a specific camera model or a particular ring light brand, but the decision to treat your on-screen presence as a professional investment rather than an afterthought.
Start with $40 worth of lighting. Upgrade your audio for another $30. Clean up your background. Position your camera at eye level. These changes take one afternoon and cost less than a night out.
The income difference they create lasts as long as you work on camera.


Want to add a comment?